
使用 Gatsby 创建静态站点
10 min read · March 12th 2018
介绍
Gatsby 是一款基于 React 和 GraphQL 的静态文档生成器。

Gatsby 从各种媒介收集数据源,通过 GraphQL 暴露给前端,前端使用 React 生成界面。Gatsby 静态化整个链路,生成纯静态资源,以保证加载和渲染速度,同时也方便部署。
Gatsby 不同于传统的诸如 jekyll, hugo, hexo, ghost 静态站点生成器。这儿从零开始使用 Gatsby 搭建一个博客站点作为入门。
准备
安装 Gatsby 命令行工具
npm i -g gatsby-cli使用模板初始化项目
gatsby new blog https://github.com/gatsbyjs/gatsby-starter-hello-world该命令克隆 starter 仓储并安装 npm 包。
Gatsby 提供了开发模式,类似 webpack-dev-server。
cd blog
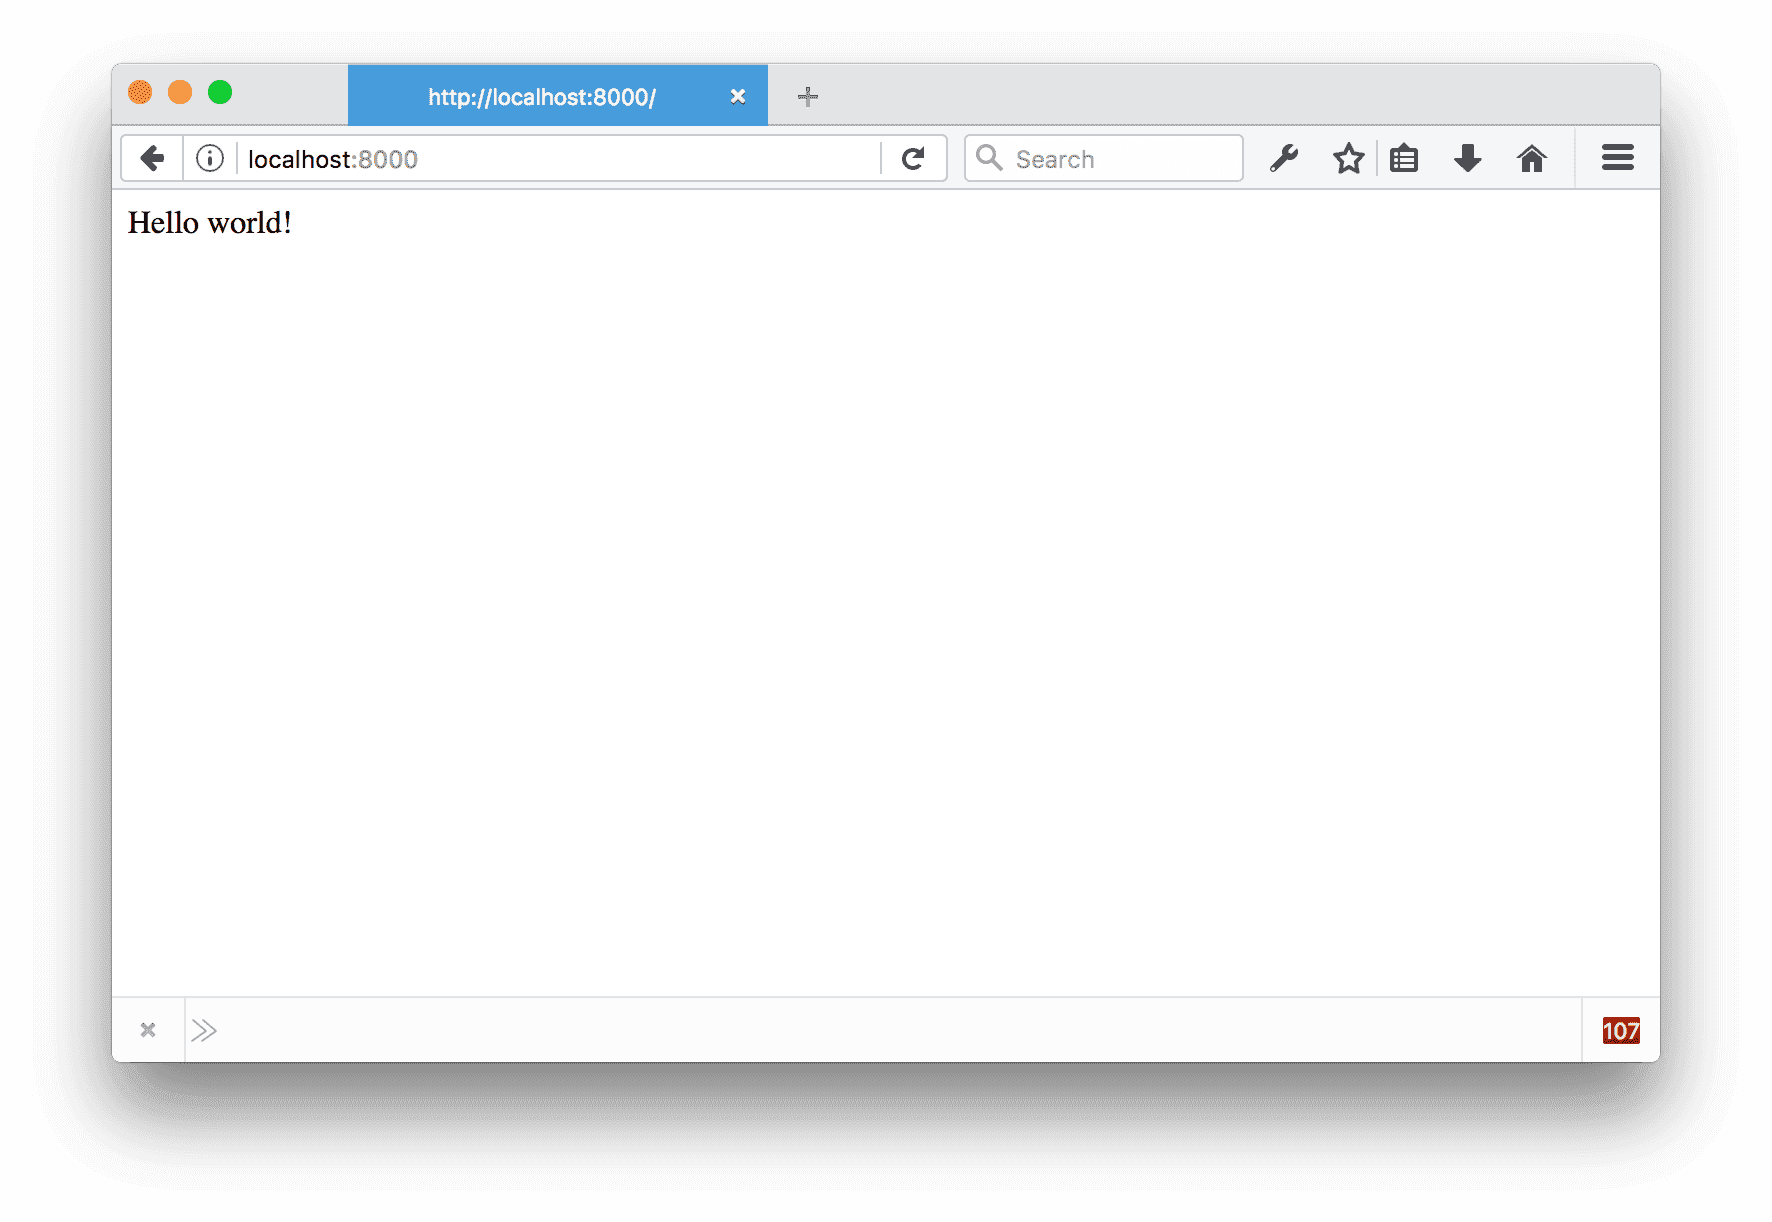
gatsby developGatsby 会编译运行项目,终端最底部会有 the development server is listening at: http://localhost:8000. 浏览器打开该地址
体验
访问 http://localhost:8000 时,Gatsby 会加载 src/pages/index.js 并渲染。
src/pages 下的文件会映射成页面,如 src/pages/about.js 对应地址为 http://localhost:8000/about/ 页面。
src/pages 下的 js 文件是普通的 jsx 文件,你可以调用 React 函数,你可以安装并使用 npm 包,你可以应用包括 css, css-in-js, css modules 在内的各种 css 风格。
现在我们再建一个页面 src/pages/about.js, 并让页面支持导航,可以在 home 和 about 之间跳转。
index.js 和 about.js 代码如下
// ./src/pages/about.js

import React from "react"
import Link from "gatsby-link"

const ListLink = props => (
  <li style={{ display: `inline-block`, marginRight: `1rem` }}>
    <Link to={props.to}>
      {props.children}
    </Link>
  </li>
)

export default () => (
  <div style={{ margin: `0 auto`, maxWidth: 650, padding: `1.25rem 1rem` }}>
    <header style={{ marginBottom: `1.5rem` }}>
      <Link to="/" style={{ textShadow: `none`, backgroundImage: `none` }}>
        <h3 style={{ display: `inline` }}>MyBlog</h3>
      </Link>
      <ul style={{ listStyle: `none`, float: `right`, margin: 0 }}>
        <ListLink to="/">Home</ListLink>
        <ListLink to="/about/">About</ListLink>
      </ul>
    </header>
    <div>
      Home Page
    </div>
  </div>
)
// ./src/pages/about.js
import React from "react"
import Link from "gatsby-link"
const ListLink = props => (
<li style={{ display: `inline-block`, marginRight: `1rem` }}>
<Link to={props.to}>
{props.children}
</Link>
</li>
)
export default () => (
<div style={{ margin: `0 auto`, maxWidth: 650, padding: `1.25rem 1rem` }}>
<header style={{ marginBottom: `1.5rem` }}>
<Link to="/" style={{ textShadow: `none`, backgroundImage: `none` }}>
<h3 style={{ display: `inline` }}>MyBlog</h3>
</Link>
<ul style={{ listStyle: `none`, float: `right`, margin: 0 }}>
<ListLink to="/">Home</ListLink>
<ListLink to="/about/">About</ListLink>
</ul>
</header>
<div>
About Page
</div>
</div>
)

一个只有两个页面的站点就完成了,可以试试点击链接,是能够正常跳转的。
布局
上面的站点中,导航部分明显是通用的,它是属于布局页面的。我们这就将它抽离出来,放入合适的位置。
src/layouts 存放布局,src/layouts/index.js 是默认布局。
// ./src/layouts/index.js

import React from "react"
import Link from "gatsby-link"

const ListLink = props => (
  <li style={{ display: `inline-block`, marginRight: `1rem` }}>
    <Link to={props.to}>
      {props.children}
    </Link>
  </li>
)

export default ({ children }) => (
  <div style={{ margin: `0 auto`, maxWidth: 650, padding: `1.25rem 1rem` }}>
    <header style={{ marginBottom: `1.5rem` }}>
      <Link to="/" style={{ textShadow: `none`, backgroundImage: `none` }}>
        <h3 style={{ display: `inline` }}>MyBlog</h3>
      </Link>
      <ul style={{ listStyle: `none`, float: `right`, margin: 0 }}>
        <ListLink to="/">Home</ListLink>
        <ListLink to="/about/">About</ListLink>
      </ul>
    </header>
    {children()}
  </div>
)
src/layouts 下的页面组件有一个 children 属性
抽出布局元素后,src/pages 下的 index.js 和 about.js 变得很简单了
// ./src/pages/index.js

import React from "react"

export default () => (
  <div>
    Home Page
  </div>
)
// ./src/pages/about.js
import React from "react"
export default () => (
<div>
About Page
</div>
)GraphQL
Gatsby 基于 React 和 GraphQL。React 负责显示层,GraphQL 负责数据层。
现在我们需要在 about 页面显示邮件信息,这个信息可能变动,可能还要显示在其它页面,直接在 about 页面中写死是没发接受的,如何将数据提供给 about 页面中的 React 呢?
答案是 GraphQL。页面中需要的数据统统需要走 GraphQL 获取。
Gatsby 为我们提供了 GraphQL IDE, 访问地址是 http://localhost:8000/___graphql。
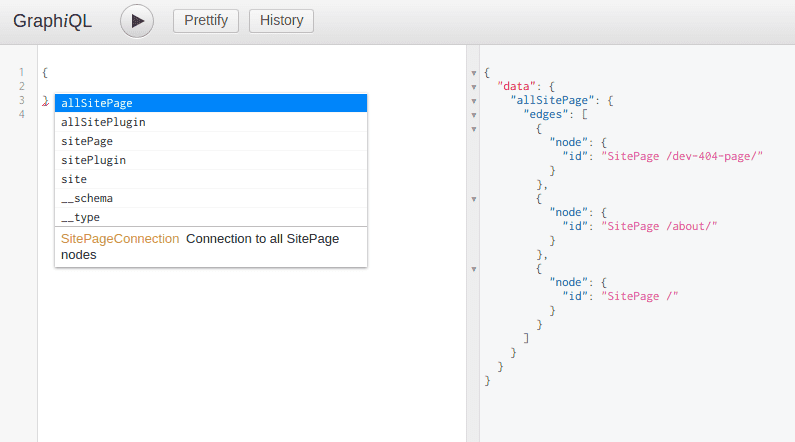
sitePage 可供访问的页面; sitePlugin 加载的插件; site 站点配置
邮件信息应该在站点配置中。看看里面有什么?
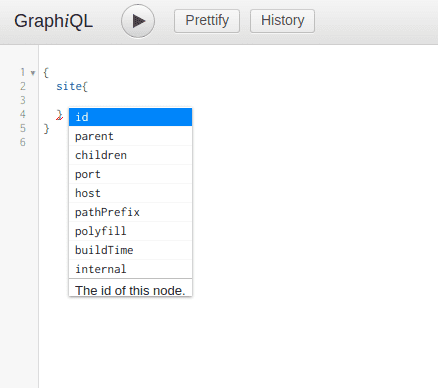
没有我们所需要的。怎样将邮件信息放入 GraphQL > site 中呢?
Gatsby 启动时会读取项目下的 gatsby-config.js 文件,并将 siteMetadata 放入 GraphQL > site 下。
// ./gatsby-config.js

module.exports = {
  siteMetadata: {
    mail: `gatsby@example.com`,
  },
}
重新运行 gatsby develop, 发现 GraphQL > site 下多了 siteMetadata 字段。
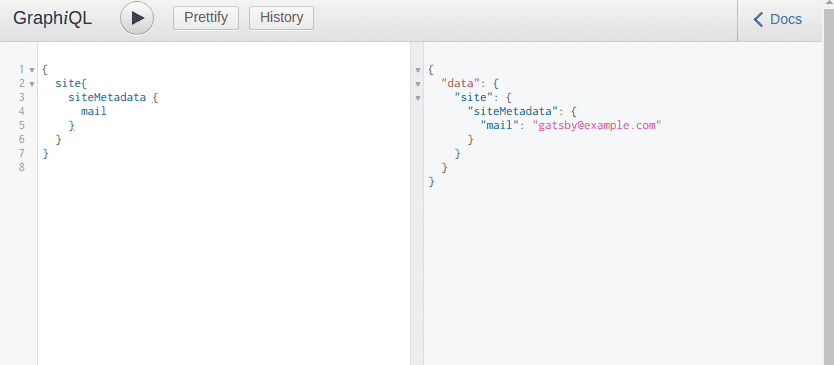
现在已经成功的将邮件信息成功的放入到 GraphQL 了,接下来我们需要在 src/pages/about.js 中获取并使用这一信息。
//./src/pages/about.js

import React from "react"

export default ({ data }) => (
  <div>
    About Page
    <div>
      mail: {data.site.siteMetadata.mail}
    </div>
  </div>
)

export const query = graphql`
  query AboutQuery {
    site {
      siteMetadata {
        mail
      }
    }
  }
`
如上,在 about.js 中添加 graphql 标签模板,并调用属性 data 即可。
Gatsby 内部会通过 AST 读取
graphql标签模板,请求获取并获取数据,之后将数据绑定到组件的 data 属性中。页面只需要负责解答获取哪些数据,怎样使用数据即可。
数据
就博客系统来说,原始数据是一批 Markdown 文件,我们需要将这批数据导入到 Gatsby 系统,使其能被页面组件以 GraphQL 查询访问。
我们使用插件 gatsby-source-filesystem 和 gatsby-transformer-remark 完成这项工作。
gatsby-source-filesystem 读取文件系统,并将文件和目录信息导入 GraphQL 中。 gatsby-transformer-remark 从文件系统信息中获取 markdown 文件信息,提取转化后导入 GraphQL 中。
准备两篇博客文章
// ./blogs/pandas-and-bananas.md

---
title: Pandas and Bananas
date: "2017-08-21"
---

Do Pandas eat bananas? Check out this short video that shows that yes! pandas do
seem to really enjoy bananas!
// ./blogs/sweet-pandas-eating-sweets.md
---
title: "Sweet Pandas Eating Sweets"
date: "2017-08-10"
---
Pandas are really sweet.
Here's a video of a panda eating sweets.其次我们需要安装插件
npm i -S gatsby-source-filesystem gatsby-transformer-remark并在 gatsby-config.js 配置插件及其选项
// ./gatsby-config.js
module.exports = {
siteMetadata: {
mail: `gatsby@example.com`,
},
plugins: [
{
resolve: `gatsby-source-filesystem`,
options: {
name: `src`,
path: `${__dirname}/blogs/`,
},
},
],
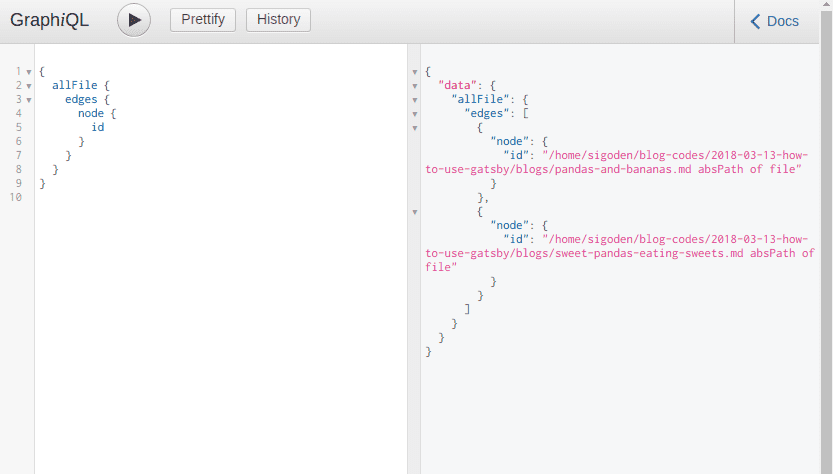
}访问 GraphQL, 发现多了一些 Query。访问 allFile,可以获取到刚添加的博客文件信息。
添加 gatsby-transformer-remark, 从文件中提取并解析 markdown 文件。
// ./gatsby-config.js

module.exports = {
  siteMetadata: {
    mail: `gatsby@example.com`,
  },
  plugins: [
    {
      resolve: `gatsby-source-filesystem`,
      options: {
        name: `src`,
        path: `${__dirname}/blogs/`,
      },
    },
    `gatsby-transformer-remark`,
  ],
}
访问 allMarkdownRemark
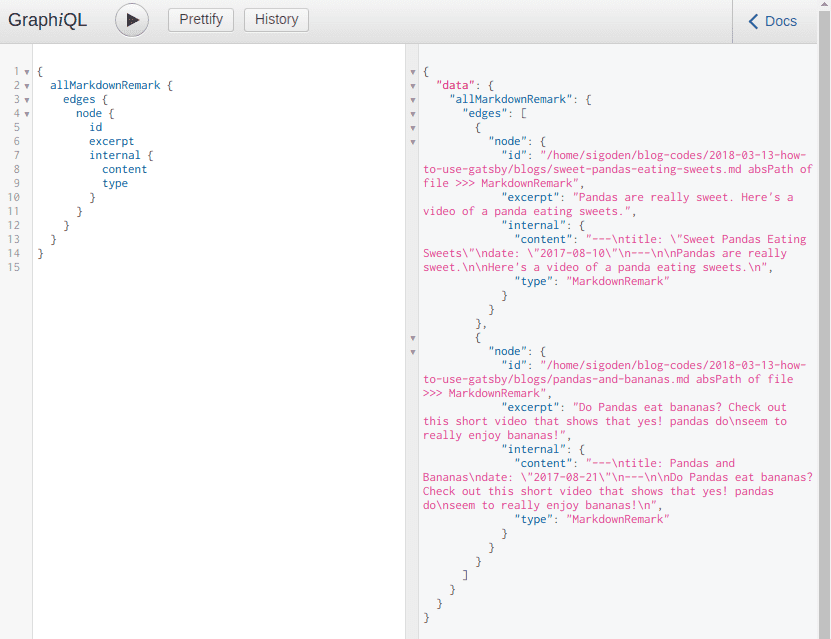
这样我们就能以 GraphQL 形式获取博客的 Markdown 文件数据。
节点
节点是 Gatsby 数据的基本单元,Markdown 文件在 GraphQL 中对应的节点内容如下:
{
"id": "/home/sigoden/blog-codes/2018-03-13-how-to-use-gatsby/blogs/sweet-pandas-eating-sweets.md absPath of file >>> MarkdownRemark",
"parent": {
"id": "/home/sigoden/blog-codes/2018-03-13-how-to-use-gatsby/blogs/sweet-pandas-eating-sweets.md absPath of file"
},
"children": [],
"internal": {
"content": "---\ntitle: \"Sweet Pandas Eating Sweets\"\ndate: \"2017-08-10\"\n---\n\nPandas are really sweet.\n\nHere's a video of a panda eating sweets.\n",
"type": "MarkdownRemark",
"contentDigest": "599beb9abf7899c2ea0aa891810a95b6",
"owner": "gatsby-transformer-remark"
},
"frontmatter": {
"title": "Sweet Pandas Eating Sweets",
"date": "2017-08-10",
"_PARENT": "/home/sigoden/blog-codes/2018-03-13-how-to-use-gatsby/blogs/sweet-pandas-eating-sweets.md absPath of file",
"parent": "/home/sigoden/blog-codes/2018-03-13-how-to-use-gatsby/blogs/sweet-pandas-eating-sweets.md absPath of file"
},
"excerpt": "Pandas are really sweet. Here's a video of a panda eating sweets.",
"fileAbsolutePath": "/home/sigoden/blog-codes/2018-03-13-how-to-use-gatsby/blogs/sweet-pandas-eating-sweets.md",
"html": "<p>Pandas are really sweet.</p>\n<p>Here's a video of a panda eating sweets.</p>",
"htmlAst": {
"type": "root",
"children": [
{
"type": "element",
"tagName": "p",
"properties": {},
"children": [
{
"type": "text",
"value": "Pandas are really sweet."
}
]
},
{
"type": "text",
"value": "\n"
},
{
"type": "element",
"tagName": "p",
"properties": {},
"children": [
{
"type": "text",
"value": "Here's a video of a panda eating sweets."
}
]
}
],
"data": {
"quirksMode": false
}
},
"headings": [],
"timeToRead": 1,
"tableOfContents": "",
"wordCount": {
"paragraphs": 4,
"sentences": 4,
"words": 19
}
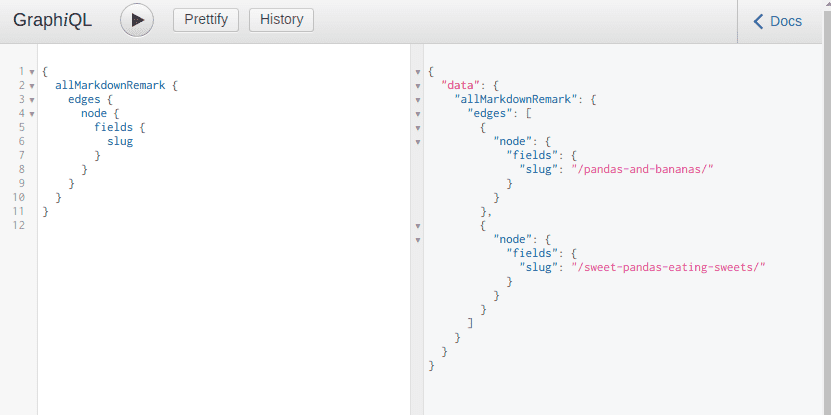
}数据还是蛮丰富的,但是我们还缺少一个字段 slug(对应文章链接),我们需要一种机制,能够修改 GraphQL 的数据。
为了保证数据安全, Gatsby 的 GraphQL 只提供了查询,没有提供修改。Gatsby 提供了 Hook API 让我们可以在存储前进行修改数据。
在启动时,Gatsby 会加载
gatsby-node.js文件,并注册或执行里面的 Hook 函数。
// ./gatsby-node.js

const { createFilePath } = require(`gatsby-source-filesystem`)

exports.onCreateNode = ({ node, getNode, boundActionCreators }) => {
  const { createNodeField } = boundActionCreators
  if (node.internal.type === `MarkdownRemark`) {
    const slug = createFilePath({ node, getNode, basePath: `blogs` })
    createNodeField({
      node,
      name: `slug`,
      value: slug,
    })
  }
}
onCreateNode 在添加节点后被调用,我们检测类型为 MarkdownRemark 的的节点,为它们添加一个 slug 字段,slug 的值通过 Markdown 文件路径生成。这样就完成了 GraphQL 数据的修改。
在 GraphiQL 中,发现节点下多了一个 fileds 字段,该字段下有一个 slug 字段。
页面
在 Gatsby 中,节点是没有路由的,我们无法通过浏览器直接访问。我们能访问的只用页面。查询一些系统中现有的页面。
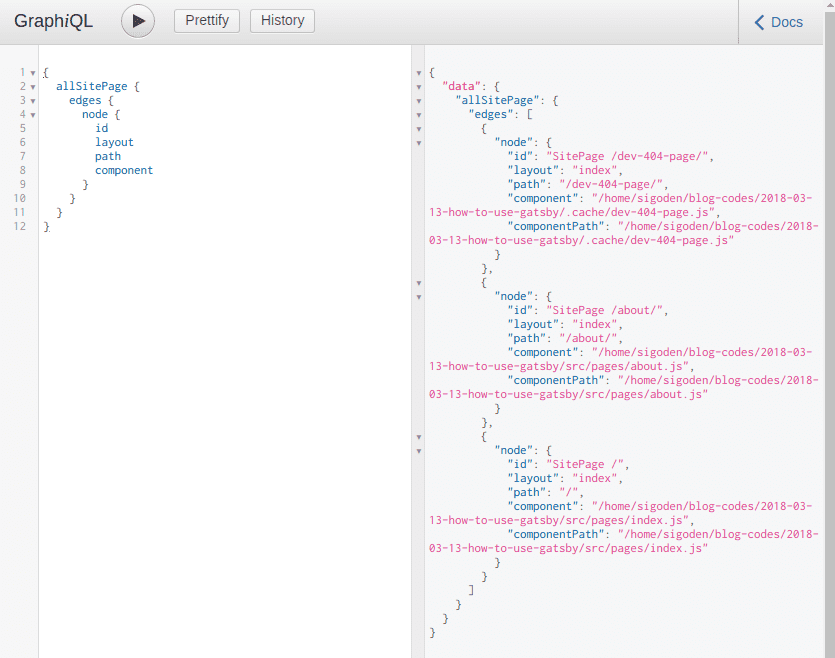
只有我们先前创建的 home 和 about,以及一个开发模式下的 404 页面。
我们需要将 MarkdownRemark 节点转换为 SitePage,以便访问。
GraphQL 提供了
createPages函数,它会在节点创建和变换完成之后调用,在该函数中我们使用 GraphQL 获取数据,再从这些数据中生成页面。
// ./gatsby-node.js

const path = require(`path`)
const { createFilePath } = require(`gatsby-source-filesystem`)

exports.onCreateNode = ({ node, getNode, boundActionCreators }) => {
  const { createNodeField } = boundActionCreators
  if (node.internal.type === `MarkdownRemark`) {
    const slug = createFilePath({ node, getNode, basePath: `blogs` })
    createNodeField({
      node,
      name: `slug`,
      value: slug,
    })
  }
}

exports.createPages = ({ graphql, boundActionCreators }) => {
  const { createPage } = boundActionCreators
  return new Promise((resolve, reject) => {
    graphql(`
      {
        allMarkdownRemark {
          edges {
            node {
              fields {
                slug
              }
            }
          }
        }
      }
    `
    ).then(result => {
      result.data.allMarkdownRemark.edges.forEach(({ node }) => {
        createPage({
          path: node.fields.slug,
          component: path.resolve(`./src/templates/blog-post.js`),
          context: {
            // Data passed to context is available in page queries as GraphQL variables.
            slug: node.fields.slug,
          },
        })
      })
      resolve()
    })
  })
}
createPage 函数用来创建页面。其参数
- path: 页面的相对访问路径,以 / 开头
- component: 模板组件绝对路径。同 pages 下的 js 一样是一个 React 组件
- layout: 布局,默认为
index - context: 页面的上下文数据对象。会以
props.pathContext的方式传递给 React 组件,也会以参数形式传递给 graphql 查询。
新建博客页面的模板 src/templates/blog-post.js,其内容如下:
// ./src/templates/blog-post.js

import React from "react"

export default ({ data }) => {
  const post = data.markdownRemark
  return (
    <div>
      <h1>{post.frontmatter.title}</h1>
      <div dangerouslySetInnerHTML={{ __html: post.html }} />
    </div>
  )
}

export const query = graphql`
  query BlogPostQuery($slug: String!) {
    markdownRemark(fields: { slug: { eq: $slug } }) {
      html
      frontmatter {
        title
      }
    }
  }
`
再查询一下 SitePage, 发现已生成了 Markdown 对应页面。

浏览器访问 http://localhost:8000/pandas-and-bananas/
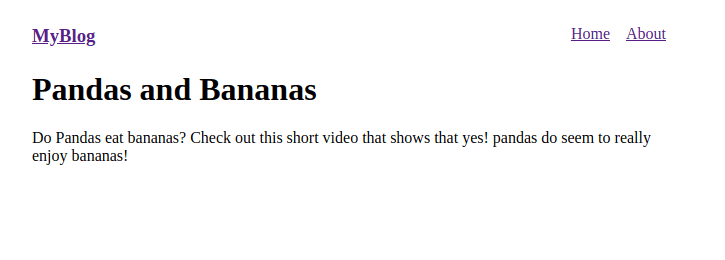
可以正确的访问博客页面了。
修改一下首页,使其显示文章列表。
// ./src/pages/index.js

import React from "react"
import Link from "gatsby-link"

export default ({ data }) => {
  return (
    <div>
      <h2>
        Amazing Pandas Eating Things
      </h2>
      <h4>
        {data.allMarkdownRemark.totalCount} Posts
      </h4>
      {data.allMarkdownRemark.edges.map(({ node }) =>
        <div key={node.id}>
          <Link
            to={node.fields.slug}
          >
            <h3>
              {node.frontmatter.title}{" "}
              <span>— {node.frontmatter.date}</span>
            </h3>
            <p>
              {node.excerpt}
            </p>
          </Link>
        </div>
      )}
    </div>
  )
}

export const query = graphql`
  query IndexQuery {
    allMarkdownRemark(sort: { fields: [frontmatter___date], order: DESC }) {
      totalCount
      edges {
        node {
          id
          frontmatter {
            title
            date(formatString: "DD MMMM, YYYY")
          }
          fields {
            slug
          }
          excerpt
        }
      }
    }
  }
`
博客系统到此完成了。

为了方便演示,这里只实现了基本功能,css,标签,翻页等就此略去。
发布
Gatsby 是静态站点生成器,现在这种前后台的交互只存在开发模式下,在部署到生产环境前,我们可以就整个站点编译成一批静态资源,方便部署到静态站点伺服器上。
这个操作只需要运行一个命令即可完成
gatsby build生成的数据位于项目的 public 文件夹下。
结语
从整个博客的创建过程可以看到,Gatsby 在功能上是很强大灵活的,而使用上又不失简单方便。数据源方面可以接入 redis, mongo, mysql 等数据库系统,可以接入 medium, wordpress 等现成的博客和 CMS 系统,具体有哪些可以看看官方提供的插件,如果没有,你也可以自己贡献插件。不管是何种数据,只要能导入到 GraphQL 节点,Gatsby 就能使用。界面方面使用 React,功能和灵活性上的强大不言而喻。以 GraphQL 作为这两者的桥接简直是画龙点睛。